

Follow the steps below to add the biography of a new Leadership Council Member to ATA-TCD.com.
Upload the Media
- Login to an ATA-TCD.com administrative account, and navigate to Media.
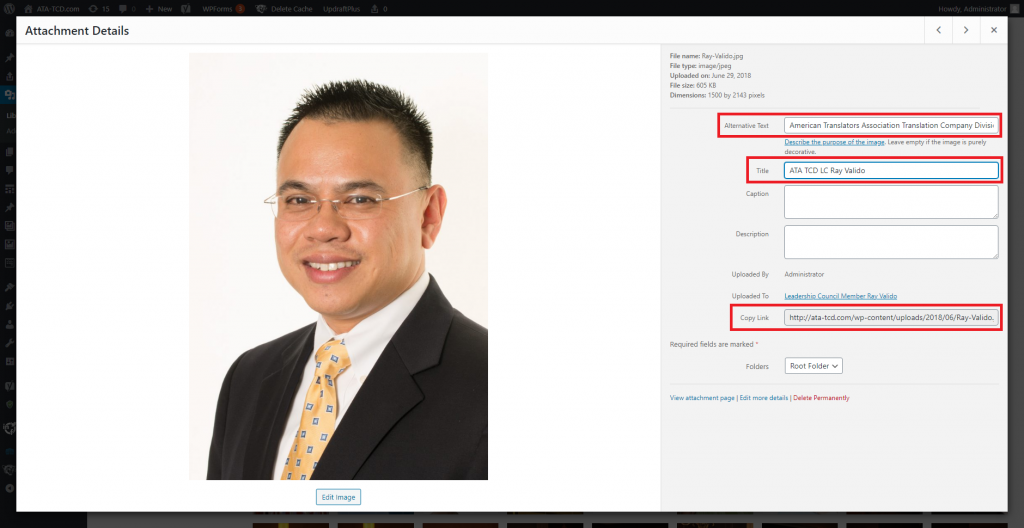
- Upload the profile image for the person’s biography.
- Once the image is uploaded, open the image to adjust the properties. Update the Alternative text (the text blind people would have read aloud to them engaging with the page) and the image Title following the below conventions.
- Alternative text: American Translators Association Translation Company Division Leadership Council Member [Insert the person’s name here]
- Title: ATA TCD LC [Insert the person’s name here]
Publish the Project
- Next navigate to Projects, as Leadership Council Member biographiess are published as WordPress Projects.
- To keep consistency in the terminology use and formatting of the biography pages, first open one of the biography projects that has already been published.
- Next click on Text within the biography page to display the html and the page content.
- Select all (Ctrl + A) and then copy that content to your clipboard (Ctrl + C).
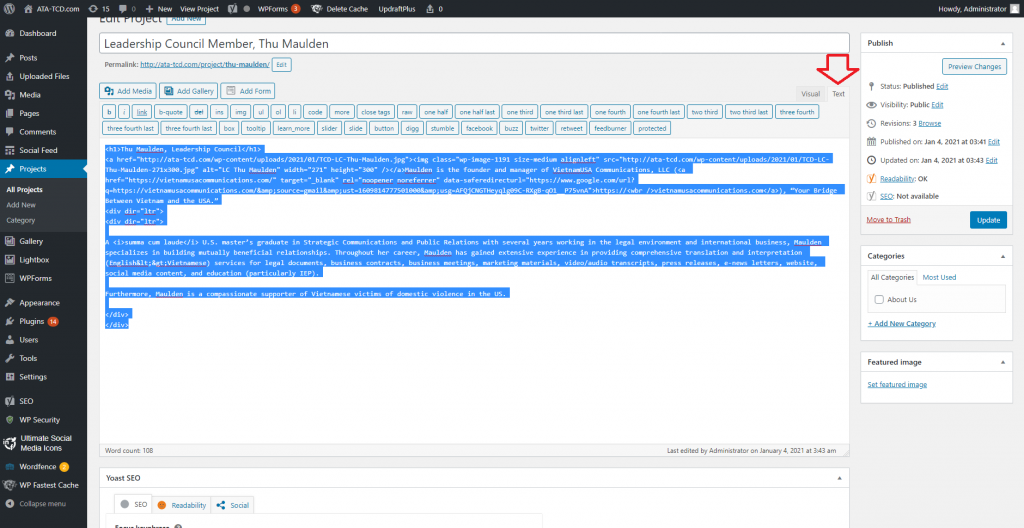
- Without altering anying from the biography you just copied content from, navigate back to Projects, and click Add New.
- Now click Text within the new biography project you just started, and paste the content from your clipboard to that page (Ctrl + P). Click back into the Visual editor to confirm that the content has transferred properly.
- Name the project according to these conventions: Leadership Council Member [Insert the person’s name here], and then shorten the Permalink for the person’s biography page so that it just contains the person’s name. Save this Permalink as you will need it later when updating the ATA_TCD homepage.

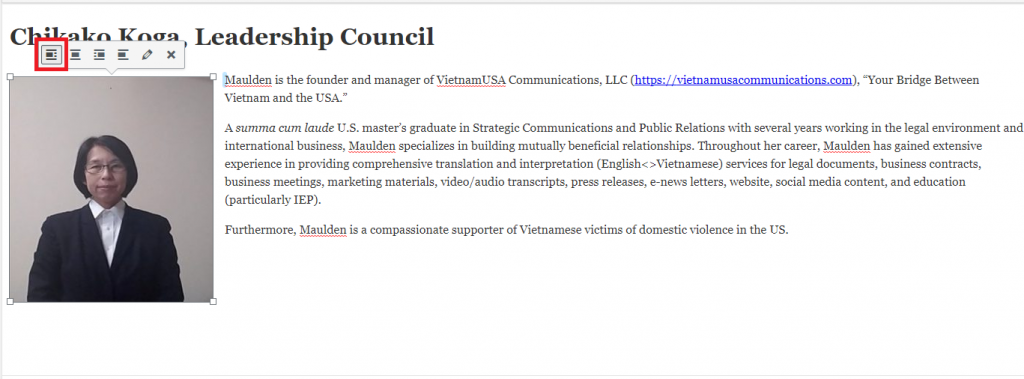
- Replace the name of the Leadership Council Member biography project you copied with the name of the LC Member whose Project page you are adding. Replace the image, and select Align Left for the image (or Align Right). Update the biography too.
Add the New LC Member to the ATA-TCD homepage
- Navigate to ATA-TCD.com and click Edit Page.
- On the page, Leadership Council Member biographies are arranged in the approximate order of when each member joined the LC. Scroll to the bottom of the page, and click the + button between the last LC Member’s picture and The Webmaster’s picture. (The Webmaster stays at the end of the page.)
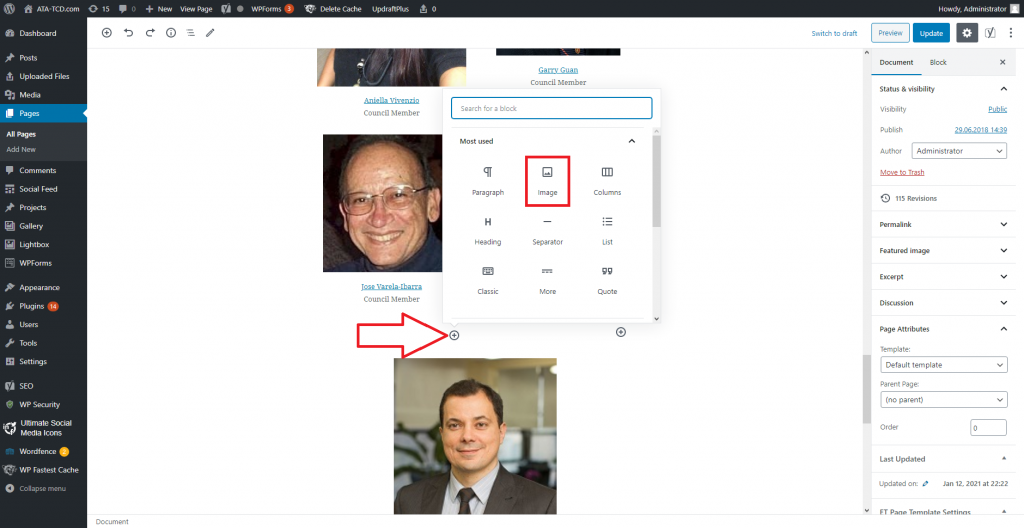
- Click Image > Media Library and then select the image of the person you uploaded to the Media library. Make sure to select Align Center for the image.
- Include the person’s name followed by the title “Council Member” on the next line. Link the person’s name to the biography page you just created for them.
Voila! You have now completed the process of adding a new Leadership Council Member to ATA-TCD.com. Send the URL of the biography page to the person featured for their approval. Make any adjustments to image sizes on the homepage as necessary to keep the two columns of LC Members approximately aligned.
Recent Comments